How to Setup a Github Pages Blogsite
Simplified Quick Start
This is a step-by-step guide for setting up your own personal Github Pages blogsite, like this one. In this guide, I’m going to show how to fork existing themes and setup a blogsite from there, in an attempt to require as little technical know-how as possible.
The website will be freely hosted by Github at https://<your-username>.github.io.
There is absolutely no payment required at any step.
You can even create, edit, and maintain the blogsite entirely through your browser,
so it is a great option if you just want to share something simple and free on the internet.
After going through the very bare minimum of setting up a blogsite, I will then explain a bit more on how to customize your blogsite. Though be warned that customizing the blogsite will quickly become a very deep rabbit hole, and will likely require more technical background and/or the willingness to fix problems.
1. Sign Up for Github
First, if you haven’t already, you should sign up and create your own Github account. Github is essentially a website for uploading and sharing code with other people. What’s important here, is that Github allows you to freely host websites through their service called Github Pages.
The username` you sign up with will determine your website's URL
(e.g. my username is mimocha, hence mimocha.github.io)
You can change your username again later on, so you don’t have to think too hard; but changing your username after you’ve already setup your Github Pages blogsite, will require you to reconfigure or setup your blogsite again.
2. Copy Other People’s Code
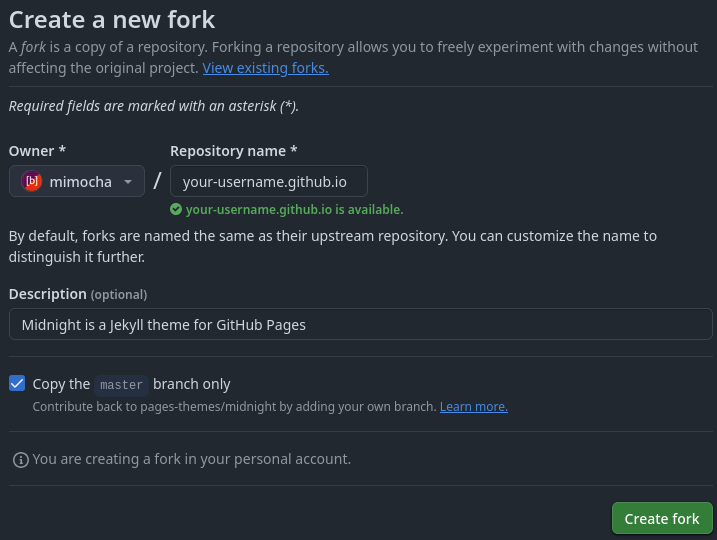
What clicking on "create new fork" will look like
Once you have signed up for a Github account, the simplest way to create a fully themed blogsite is to literally copy other people’s code. The programmer term for this is to “create a fork”.
You can also create an empty repository, starting out from scratch like in the Official Github Pages quickstart guide. However, I’ve found that customizing from scratch can be a headache; especially if you just wanted a website that looks good out of the box.
So this guide, I’ll be showing you how to create your blogsite by forking from a theme you like.
3. Finding Themes
For finding a good theme to use for your blogsite, here are some good resources:
3.1 github.com/pages-themes
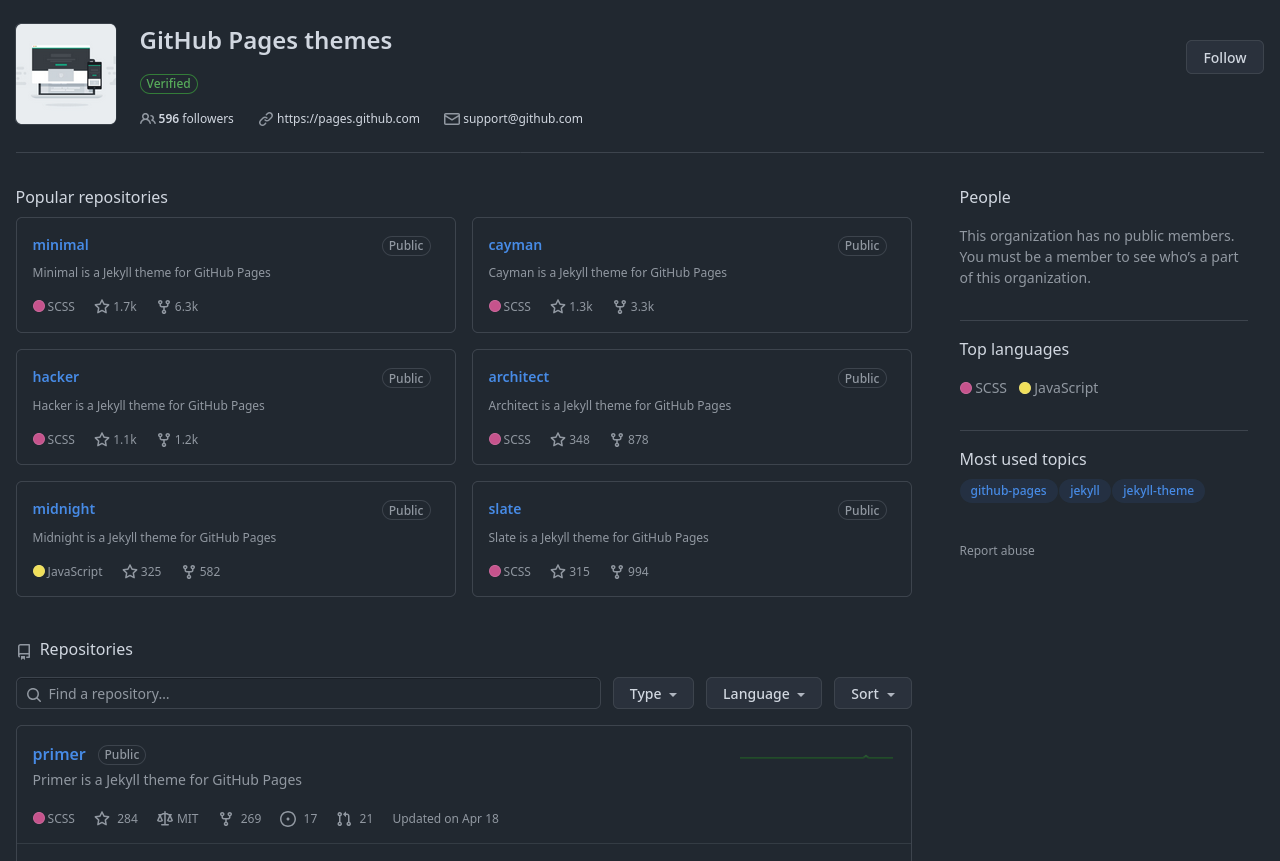
The "official" list of themes by Github
Github provides a curated list of 13 simple themes. The design and functionality of these themes are nothing flashy, but forking from them will just work.
I would recommend selecting a theme from here if you are just getting started, and / or if you want something simple (so you can focus on other things like writing your blog post)
3.2 jekyllthemes.org
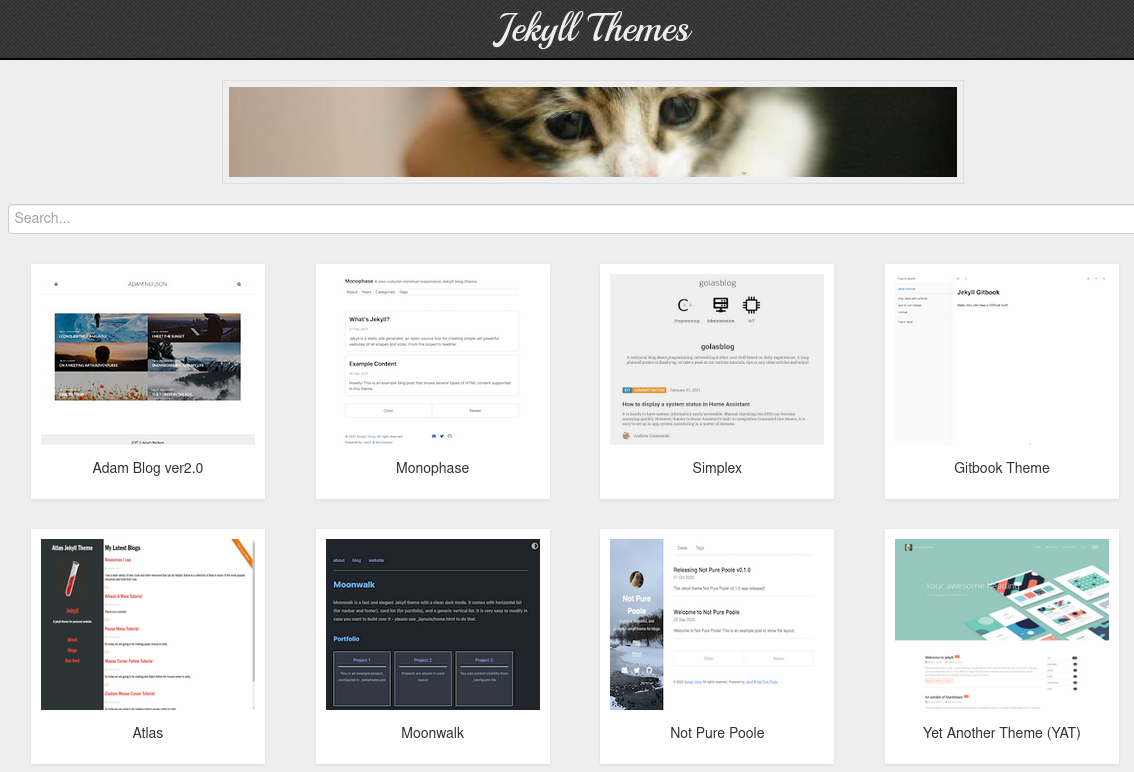
Community-created themes, free to use
Jekyll is the technology powering your blogsite behind the scenes. It is a tool that converts simple text files into a proper webpage, with links and styles and everything. All that matters here, is that people freely create and share their themes, which can be browsed on community websites like this one (created by Matt Harzewski). Many of these will also work straight out of the box, but you will have to checkout the theme’s usage descriptions to be sure.
I would recommend selecting a theme from here if you are willing to spend some more time learning and tinkering (or if you didn't like any of the previous 13 themes)
3.3 jekyllthemes.io
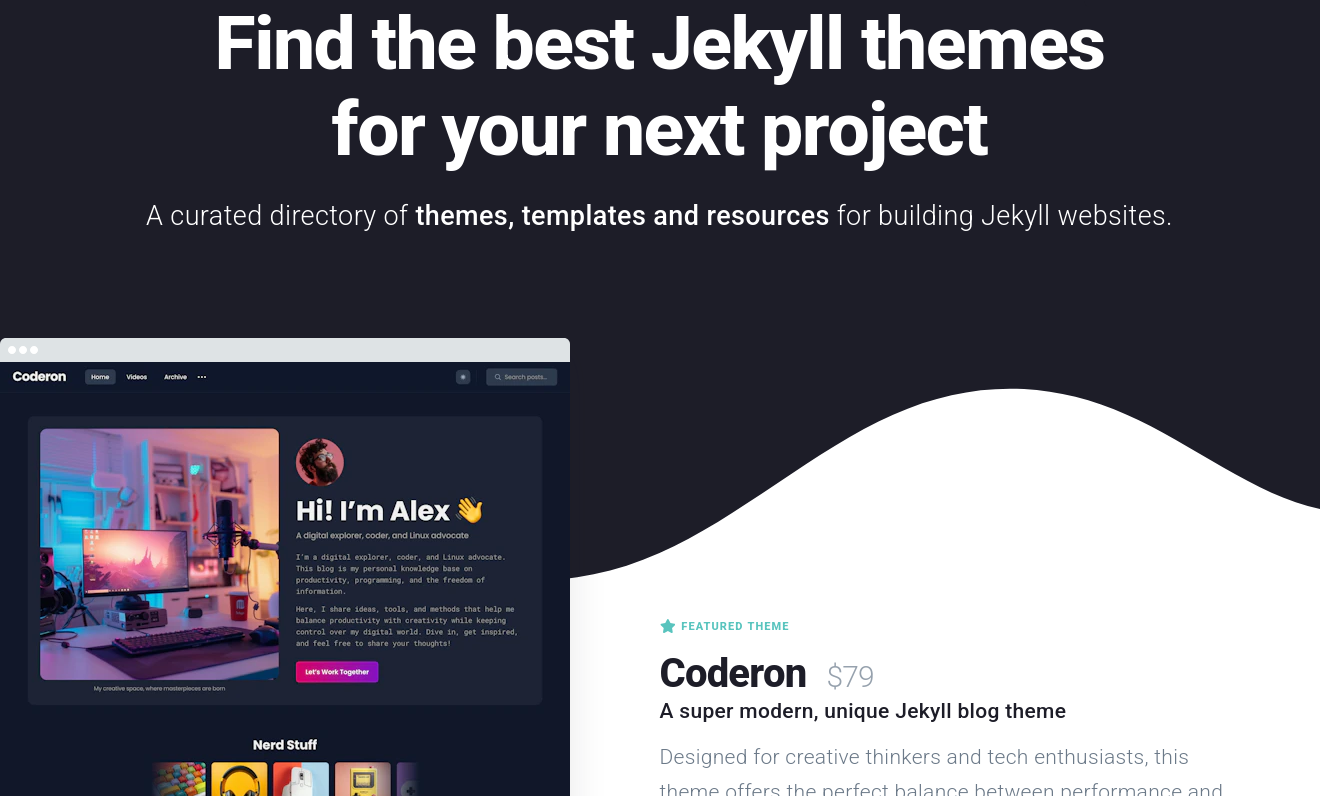
More premium-looking community themes
Finally, this community website (created by Mike Harmer) showcases various premium themes - some for sale, and others for free. The site appears to curate good looking, high quality Jekyll themes. I personally haven’t used this site so I can’t comment on it, but you should be able to find both free and paid themes from here as well. (I don’t know how paid themes work, so I can’t help you with that.)
4. Forking the Repository
Once you’ve selected your favorite theme, it is time to navigate to the theme’s Github repository to fork it. For this guide, I will be assuming your theme is available on Github, and I will be using the midnight theme provided by Github for demonstration - since I personally started this blogsite with that theme.
4.1 How to fork the theme
1) Navigate to your theme’s Github repository
2) Near the top-right corner of the screen, click on the
forkbutton
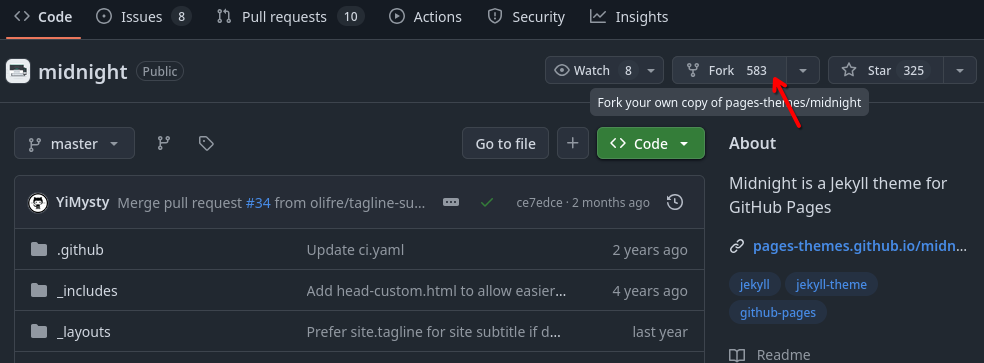
The fork button
3) On the “Create a new fork” page, set the “Repository Name” to the format
your-username.github.io. It is important that the repository name is exactly in that format otherwise Github Pages will not work. You should see the green check mark and message telling you that the repository name is available.
4) Then click on
create fork.
I am only using your-username.github.io as an example, please don't literally use that...
5) You should be automatically redirected to your new repository. If you aren’t for some reason, you can also navigate to
github.com/your-username/your-repository-name. For example, in my case that would begithub.com/mimocha/mimocha.github.io
4.2 How to publish your blogsite
6) From your new repository, navigate to the Settings tab, near the top-center of your screen
7) Then navigate to the
Pagesmenu on the left
8) Set branch to
master(ormainor whatever is the main branch for your theme - there should be only one option available besides “Nonee”) and click save.
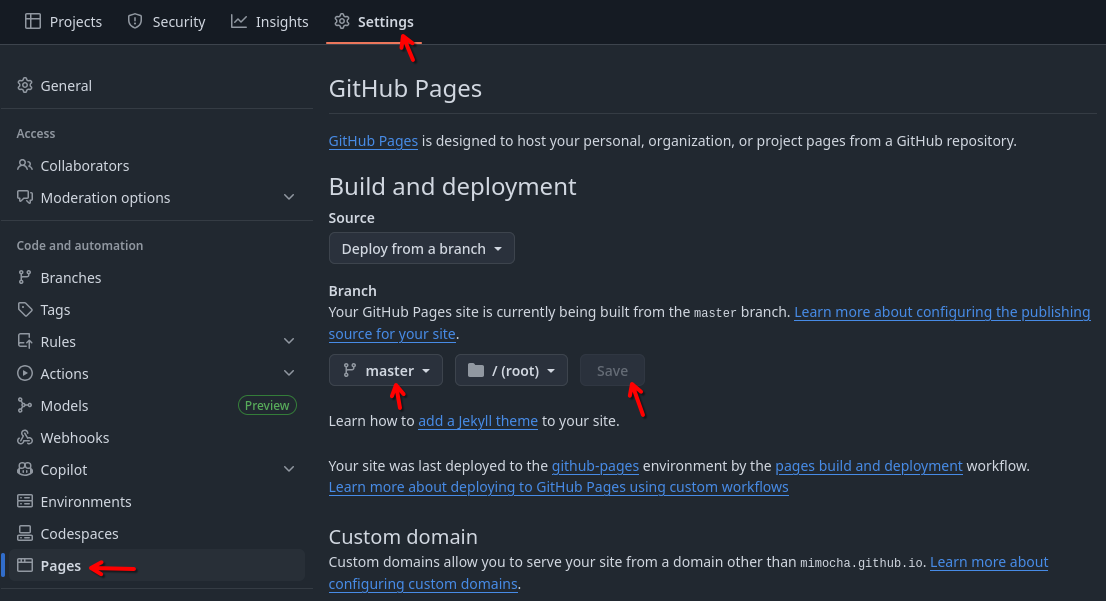
Set the branch from here
9) Once you’ve saved, go back to your repository’s main page and wait for a few moment (usually about a minute). Wait until the “Deployments” section turns green, then your website should now be live at
your-username.github.io!
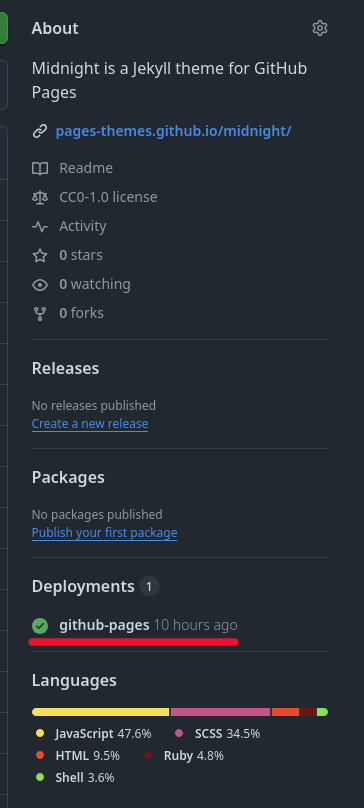
You should see this turn into a green check after a refresh
Congratulations on hosting your blogsite!
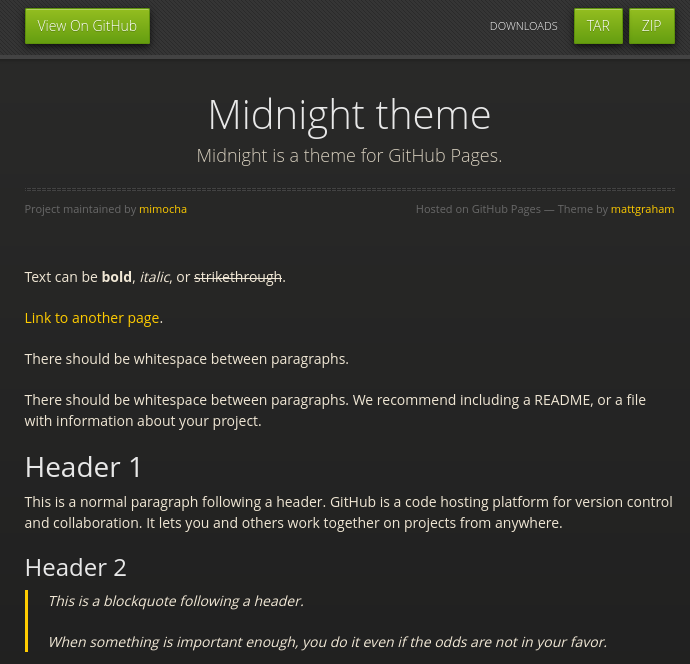
You should get a simple, styled website if everything goes correctly to plan
5. Using Your Blogsite
To start using your blogsite, you will need to edit a few files in your repository. Here are some of the key files you will need to edit:
| Filename | Description |
|---|---|
_config.yml |
This file controls your website’s configurations, including things like the title, descriptions, and more (depending on what functions your theme offer) |
index.md or index.html |
This is the landing page for your website - the first page visitors will see. |
_posts/yyyy-mm-dd-your-post.md |
These are your blog posts. Posts are formatted with markdown (more on this later). The file needs to be stored under the special directory _posts, and named in the format yyyy-mm-dd-your-post-name.md (where yyyy-mm-dd is the date of your post) |
5.1 Making Changes on Github
All the files you need to edit are text files, which you can edit with any text editor you like. My typical recommendation for most is to install and use VSCode alongside git on your computer.
Unfortunately, for those who have never done coding before, this will be yet another level of complexity to learn. Especially learning how to use git, and learning how to integrate git with Github can be a pain for first time learners.
So an even simpler alternative would be to manually upload and edit files directly on Github.
5.1.1 Create & Upload Files
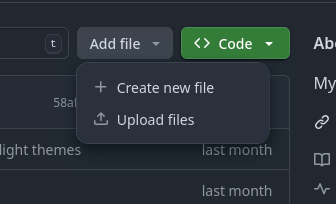
Click the Add File drop down from your repository page to either create a new file directly in your browser,
or upload a file you create on your computer to the repository.
5.1.2 Editing Files
You can also edit files directly on Github, by clicking into the file you want to edit, clicking the pen icon on the top-right corner of the screen, making changes to the file, then clicking the green commit buttons.
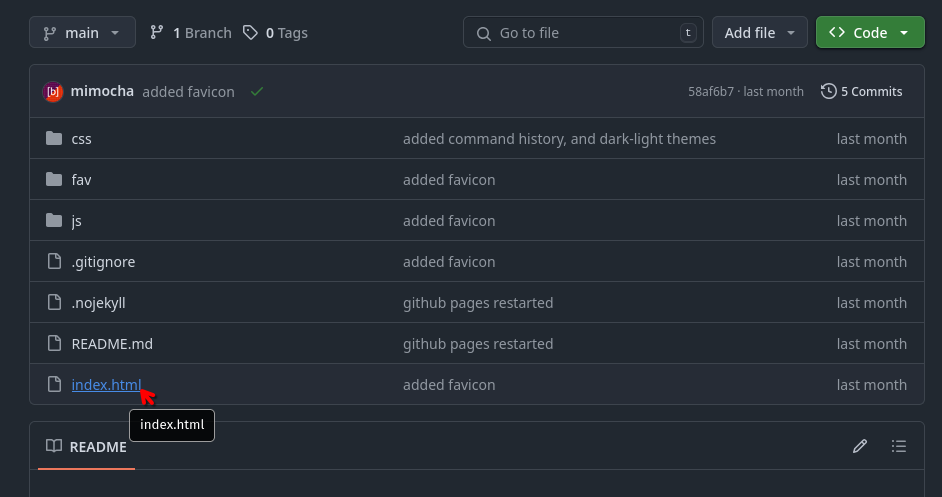
First, navigate to, and click on the file you want to edit
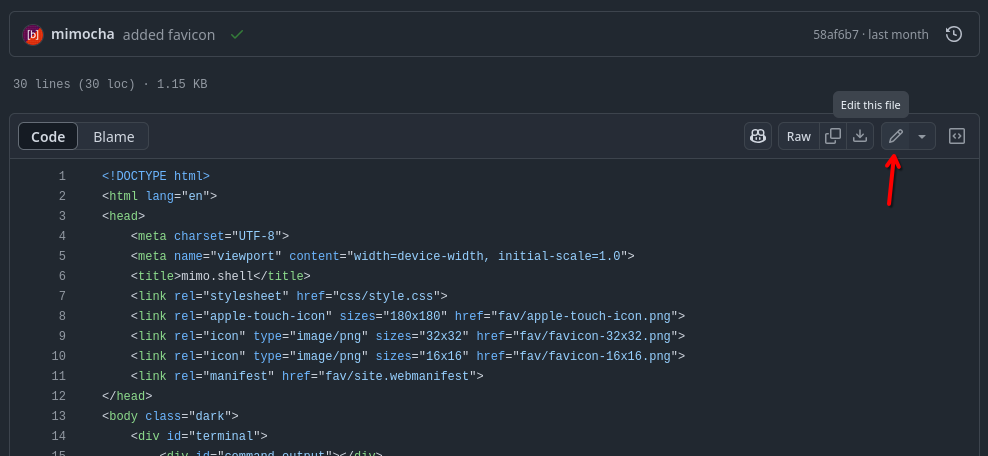
Then click on this little pen icon to start editing
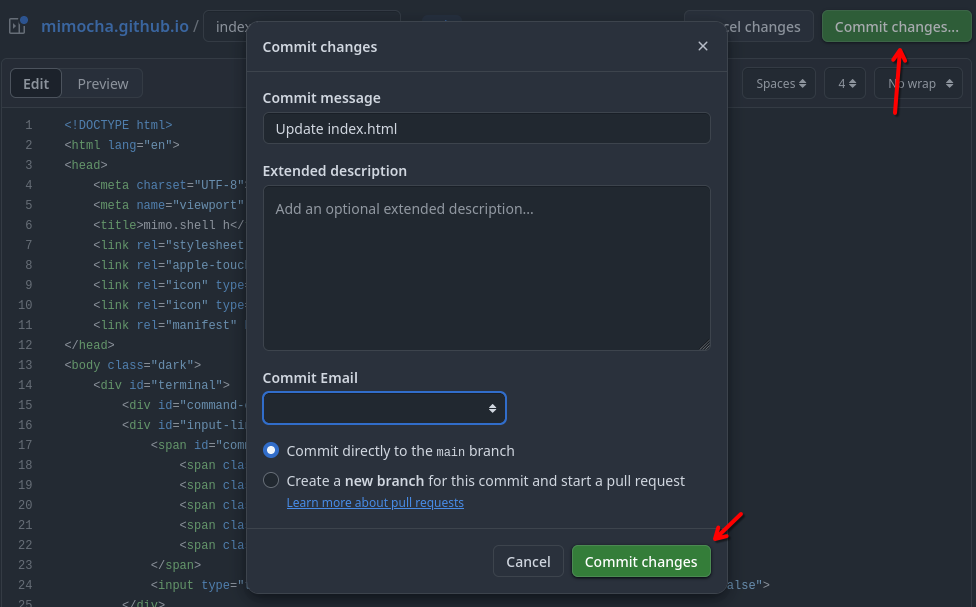
Once you've made changes, click on the green "commit" buttons to confirm the change. Adding in description and commit messages is optional, and is mainly for you to refer back to (it is public, so don't write anything sensitive in there.)
5.2 Config.yml file
The _config.yml file is what controls the big picture of your website, like titles, descriptions, tag, author name, etc.
The file follows a syntax called YAML.
Fortunately, it is pretty simple to use, and you won’t have to do anything advanced with it.
Pro tip: copy from other people's code, like from this example here:
title: mimo.blog
tagline: My personal blog and collection of random research notes and devlogs
description: A personal blog by Chawit Leosrisook, including random research notes and various devlogs.
baseurl: "/"
There is a special configuration called baseurl
which tells Jekyll, where your website index will be.
The critical thing is, if your repository is named your-username.github.io,
it must be configured to baseurl: "".
Meanwhile in my blogsite's case, I have a separate repository configured for this blogsite.
My repository is blog, which means I must configure mine to baseurl: "/blog"
Incorrectly configuring this can cause your website to not display correctly!
5.3 Front Matter
Front Matter is a special piece of text at the beginning of your post files, it is used to tell your blogsite important information about the post; like title, date, tags, etc.
The format for Front Matter is actually YAML. again,
this time sandwiched between two sets of triple dashes ---, at the top of your post and pages files.
It will look like this:
---
layout: post
title: Your Post Title
date: 2025-06-27
---

# This is a header for your post

## Yet another header

Your blog post blah blah...
What variables need to be set again depends on your theme. But the bare minimum are these three, which should be universal among all themes.
The layout variable must match what is provided by your theme.
Check your theme's _layouts/ directory to see what layout types are provided.
For example, the theme "minimal" provides two layouts to choose from: "default" and "post".
If your front matter is not setup correctly, your page will be shown as a bare text screen
(white background with black text and zero style.)

5.4 Markdown, & Liquid Formatting
Markdown is a simple text formatting format, where you tell the computer text are
**bold** or _italic_ or code, etc. All done in plain text.
I won’t go into details of how markdown work, since there are already many better guides out there, like this one: https://ghost.org/changelog/markdown/ (And since this guide is getting way too long already.)
Liquid, meanwhile, is yet another syntax to keep in mind. It’s a templating language that Jekyll uses to process your files. Think of it as special instructions inside your text files that tell Jekyll to do things, like inserting your site’s title, or creating a list of all your blog posts on the homepage. You don’t need to be an expert in it to start, but knowing it exists helps when you see it. You can learn more from the official Liquid documentation.
5.5 Adding images to your site
You can add images to your post with a markdown syntax like:
 -- if you want to link image from the web
 -- if you want to keep images in your repository
You can host your images on sites like imgur.com, and then copy the links to use in your blog.
Alternatively, you can also store images directly within your github repository, for free image hosting.
I suggest creating a folder like assets/images to keep things organized.
You can again upload images directly through the Github website interface in your repository.
Note that storing images in your repository will require mixing path with Liquid syntax.
The `relative_url` part is a Liquid filter that helps Jekyll find your image correctly.
So if you uploaded `my-cool-image.png` to an `assets/images` folder,
your path would be `/assets/images/my-cool-image.png`.
You can learn more from here: Jekyll | Liquid Filters
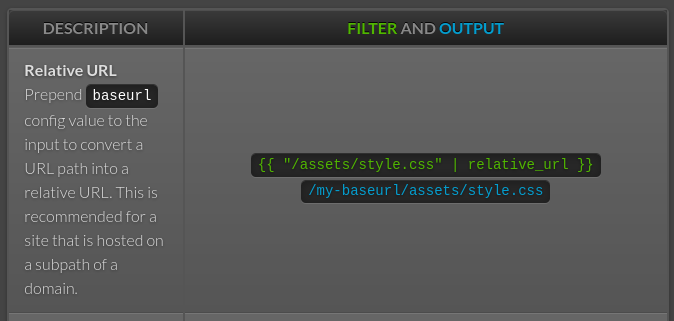
Using relative URL to dynamically point to your image file will look something like this. I can't easily write about it in this guide because using liquid syntax to explain liquid will break Jekyll...
6. More Advanced Customization
This section covers some more advanced topics for when you’re ready to dive deeper.
6.1 Layouts
As briefly mentioned above, layouts are the HTML files that define the structure of your pages.
Basically they are templates for different pages in your blog.
For example, post.html is the template for all your blog posts,
defining where the title, date, and content should go.
The home.html or default.html layout defines the structure for your main page.
Layouts files are stored in the directory: _layouts/layout-name.html
By editing and creating your own layout files, you can change the overall look of your site, but this requires some more knowledge of HTML.
These files also uses Liquid tags like to insert the content from your markdown files into the template.
You can learn more from here: Jekyll docs - Layouts
6.2 Favicon
Favicons are the small icons that appear on your browser tab next to the page title.
Changing it requires creating your own favicon, adding them to your directory, and editing the HTML headers for your theme.
This varies depending on how your theme has set it up.
For example, themes like midnight has their favicon HTML tags stored in a special _include file:
You can create your own favicon using an online tool like Favicon.io, then upload it to your repository, and configure your HTML files to show the change. This can be a bit complicated if you don’t know exactly how the theme has the favicons setup, so be sure to read the documentations!
6.3 Adding New Pages
Your blogsite isn’t just for posts. You might want an “About Me” or “Contact” or even your own “404” page.
To do this, simply create a new markdown file in the root of your repository, for example about.md or contact.md.
Jekyll will automatically convert these files into a new page at your-username.github.io/about or your-username.github.io/contact.
Conclusion
And that’s it! This guide should cover the basics of setting up and using your own blogsite with Github Pages and Jekyll. The world of web development can seem complex, but hopefully this has shown you that you can get a great-looking site up and running with very little code.
From here, the best way to learn is to experiment. Try writing a new post, changing some colors, or adding a new page. Don’t be afraid to break things - you can always look back at your repository’s history to fix mistakes.